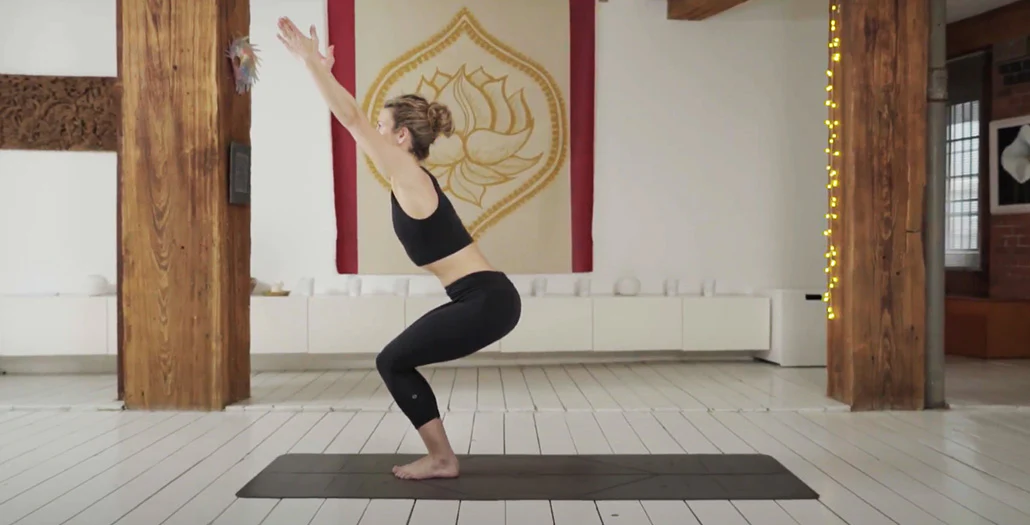
Chair pose, or Utkatasana in Sanskrit, is a standing yoga posture that targets the core and lower body. It involves raising the arms alongside the ears while bending the knees as if sitting in an invisible chair. This pose is beneficial for energizing the entire body and enhancing creativity and mental strength. It goes by various names, including fierce pose, powerful pose, and awkward pose in Bikram yoga.
Benefits Of Chair Pose
- Strengthens and Stabilizes Lower Body :Utkatasana strengthens and stabilizes the legs, ankles, and feet, enhancing overall lower body strength.
- Core Strengthening :This pose engages the abdominal muscles and lower back, promoting core strength and stability.
- Chest and Shoulder Stretch :Utkatasana opens and stretches the chest and shoulders, improving flexibility in the upper body.
- Enhances Confidence and Focus :Regular practice of Utkatasana can improve confidence and focus, as it requires concentration and balance.
- Mula Bandha and Uddiyana Bandha Practice :Practicing Mula Bandha and Uddiyana Bandha during Utkatasana creates lightness, tones the pelvic floor muscles, and strengthens the lower abdomen.
Instructions (Step-by-Step)
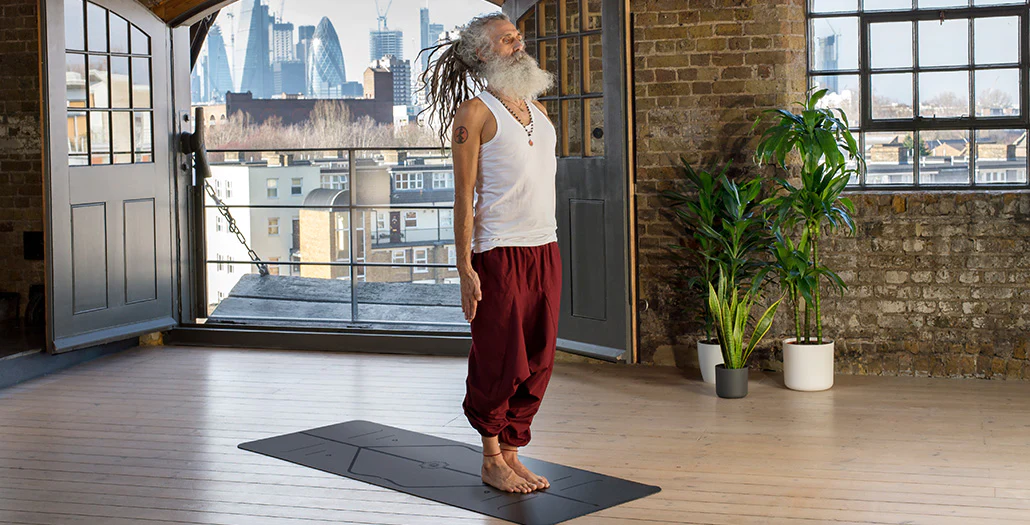
- Starting Position – Mountain Pose / Tadasana: Begin in Mountain pose, standing with your feet together and arms by your sides.
- Chair Pose Execution:
- Exhale as you bend your knees, moving your hips back as if sitting down on an imaginary chair.
- Draw your lower abdomen in and up to support your lower back.
- Send your hips back, ensuring you can still see your toes.
- Inhale as you raise your arms up around your ears, softening your shoulders.
- Continue reaching higher while sitting lower, holding for 5 to 10 breaths.
- Returning to Tadasana: To return to Tadasana, exhale, press your feet down to straighten your legs, and bring your arms down to your sides.
Common Mistakes Of Chair Pose
- Avoiding a sway back; tuck the tailbone slightly and keep the spine long.
- Aligning the feet and ankles; they should be together with the big toe mounds and ankles touching.
- Bringing the knees together; ensure they’re in line with each other and visible over the toes.
Precautions Of Chair Pose
- Knee pain: Modify the depth of the squat, keeping knees bent less or using props for support.
- Low back pain: Maintain a straight back, avoiding rounding of the lower back during the pose.
- Balance issues: Use props or practice near a wall for added stability.
- Pregnancy: Avoid deep squats and modify the pose; seek guidance from a prenatal yoga instructor.
- Recent or chronic injury: Avoid or modify the chair pose to prevent additional strain.
Modifications On Chair Pose
4 Ways To Modify Chair Pose
If your ankles feel tight:
Experiment with a rolled-up mat under your heels for added support and reduced ankle dorsiflexion. Start by tightly rolling up about half the length of your mat. Position your feet with heels on the roll and balls on the floor, spreading your toes for a wider base of support.
If you have shoulder pain:
Experiment with keeping your hands at your heart while entering the pose. Press them firmly together, expanding evenly across your chest and back. If comfortable, lift your hands toward the ceiling with palms pressed together, avoiding discomfort. This modification is beneficial for those prone to rounding through the low back.
If you have knee pain:
Give this a try: Perform the pose against a wall. To manage knee pain, limit excess rotation and glide at the knee joint. Stand with feet hip-distance apart, about a foot from the wall. Hinge at your hips until your buttocks touch the wall. Slide down within your comfort zone without bending knees past 90 degrees. Keep knees directly above ankles. Arms can be overhead, on hips, or at your heart.
Take a Load Off:
Short and sweet: When bending forward with arms raised, you redistribute weight and strain on your back, hips, and hamstrings. Excessive forward tilt over-elongates hip muscles, leaving the spine to compensate. Keep your torso upright, arms lifted or pressed together at heart center to reduce strain on your spine.
Variations
Chair Pose with a block:
Enhance the activation of your inner thigh muscles (adductors) by holding a block between your thighs.
Chair Pose against a wall:
Practice Chair Pose by standing with your back against a wall, gradually walking your feet forward, and lowering into the pose. Ensure your feet are hip-distance apart and that your knees align directly over your ankles, not in front of them. Hold the pose for several breaths to several minutes.
Chair Pose against a wall, arms raised:
Explore a variation by lifting your arms into a V shape after the previous step. If you feel stable, lean forward while keeping your hips against the wall. Hold the pose for several breaths to several minutes, then return your back to the wall and slowly walk your feet back to come out of the pose.
Tips For Beginners
- Squeeze your legs together as if they are one to build strength. You can use a block or a rolled-up towel for practice, imagining you are squeezing it while internally rotating the thighs and creating a powerful foundation.
- If needed, make your base more stable by bringing your feet wider apart.
- Press through your feet evenly, balancing the weight between your heels and the balls of your feet, to lift the upper body.
- Start by practicing the leg action, placing your hands on your hips or a stable chair for support.
How To practice Chair Pose
- Stand in Tadasana. Inhale as you raise your arms overhead, positioning your biceps slightly in front of your ears. You can keep your arms parallel with palms facing inward, or join your palms together.
- Exhale and bend your knees, aiming to bring your thighs as parallel to the floor as you can. Your knees will project out over your feet, and your upper body will lean slightly forward over your thighs, forming approximately a right angle.
- Keep your inner thighs parallel to each other and press the heads of the thigh bones down toward your heels.
Learn this pose perfectly under our certified yoga trainer. Join our online yoga classes now. Browse More Standing Yogasanas and complete Yogasanas Library.